

My Aunt Terre made me and my sisters little bags like this for Christmas one year. I use one of them for L a lot, but decided to draft the pattern with some variations. It's pretty simple, but also really versatile and could be dressed up in a million ways - it would make a sweet valentine for your little one!
The complete instructions are included in this post, or you can download the pdf with more pictures HERE. Be sure to also copy the images of the pattern at the bottom of the post.
Made some? I'd love to see! Add it to the wewilsons pattern pool.

This picture shows several sizes and all four variations. The small man is from a regular 8x10 sheet of paper and would make a nice toy bag for your little one to carry. The bear and dog are not quite double the first and will hold lots of little toys for car trips, church, or other outings. The cat is almost 300% of the original and would make a sweet pajama bag for sleepovers!
Bear Bag Tutorial (with Cat, Dog,and Person Variations)
Materials:
Pattern, Fabric to fit size of pattern (fat quarter to as big as you want), scissors, pins, sewing machine, yarn or other form of cord, buttons, felt, embroidery floss
Tips on Printing the Pattern:
This pattern will fit neatly on regular typing paper. If you print it out to this size, it will make the smallest size bag in my pictures. If you want to enlarge it, you have a few options. You could print it out on multiple sheets of paper, then trim off the margins and tape it all back together. Or you could take it to some place with a copy machine and enlarge it to whatever size you’d like. OR you could do it the old school way by printing it on one page, then using graph paper enlarge it by hand.
Instructions:
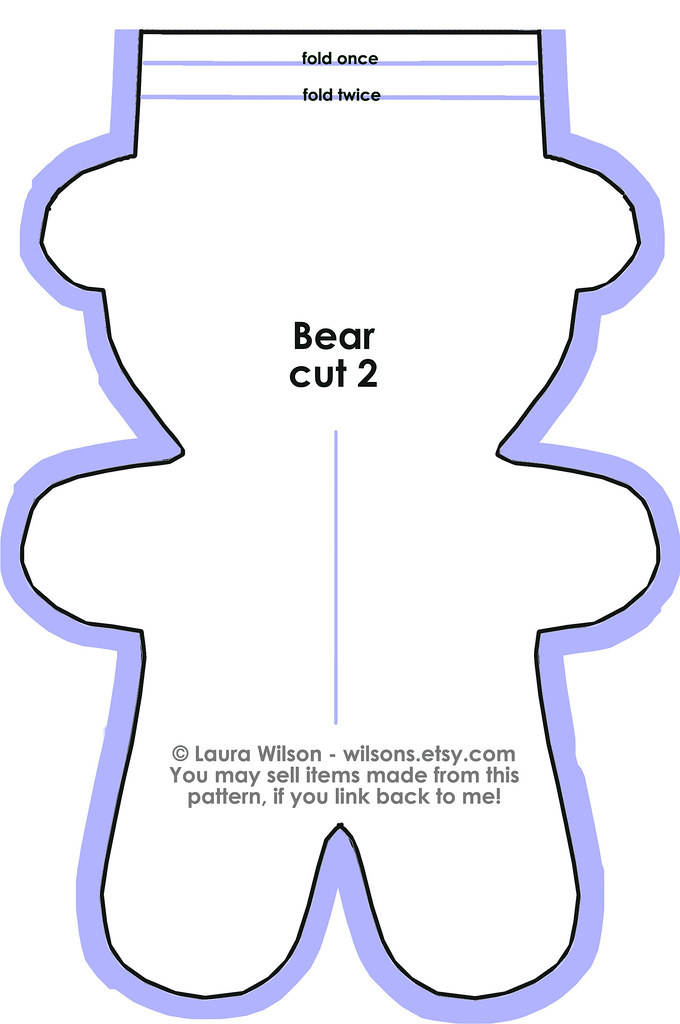
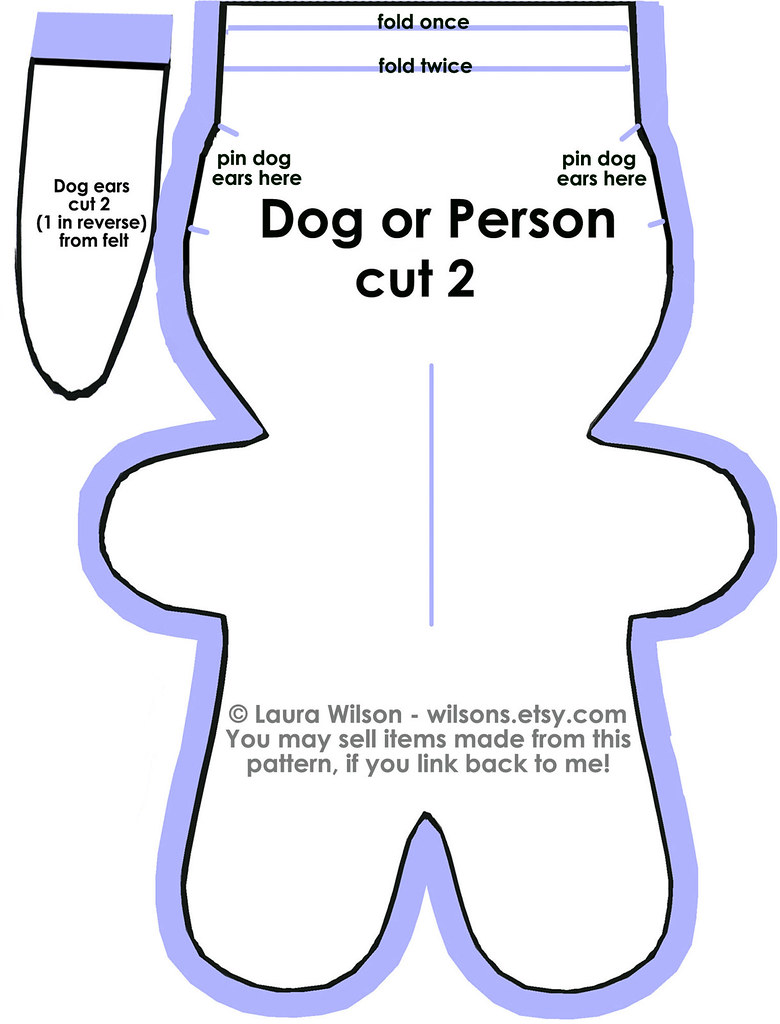
1. Print and cut pattern. Printed on an 8x10 it will make the smallest size pictured. Enlarge for a large toy bag or a pajama bag.
2. Pin pattern to your fabric and cut 2 pieces. If using Dog variation, also pin and cut ears from felt.
3. Right sides facing, sew together the body pieces leaving open on top flat edge. If using Dog variation, pin ears in place sandwiched between the two layers. Backstitch on corners and angles to reinforce. Make nice clean angles by pivoting the fabric around your needle.
4. Clip slits in seam allowance along all curved edges and corners as close to the seam as possible without cutting through seam. This is very important. Turn bag right side out to make sure it lays neatly. If not, turn back inside out and clip a little more. When it lays nicely, press the bag to help keep its shape.
5. With bag inside out, fold the opening wrong sides together about 1/4 - 1/2” (depending on size of bag you’re making) to begin the drawstring casing. Sew flat all the way around opening.
6. Fold top edge a second time, about 1/2” so that it uses all of the remaining space allowed for the opening. Sew flat almost all the way around, leaving a 1” gap to insert cord.
7. Take three lengths of yarn about 5 times lenghth of your opening. Tie the three yarns together with a knot on one end and braid the length of the yarn. Tie a knot at the end. If you are making the smallest size bag, use a finer yarn or allow extra room for your casing. If you have another material like cording, shoe laces, twine, or other small rope, that will work fine and you don’t have to make your own.
8. Attach a safety pin to the yarn (or your cord) and push through the casing around the opening of the bag. Once pulled through, with the opening fully opening, tie the two ends of the cord together, leaving long tails to pull.
9. Now you’ve completed the bag! Dress it up by adding some face details. Use buttons for eyes, scraps of felt for noses, and embroidery floss for cat whiskers. Be creative! I gave mine a tie. :)

Here are the patterns for each animal. They fit and 8x10 sheet of paper, but can be enlarged, too.

1 comment:
This is brilliant!!! I'm already thinking that my daughter needs a kitty-shaped bag.
I blogged your tutorial at Craft Gossip Sewing Blog:
http://sewing.craftgossip.com/tutorial-sew-a-bear-shaped-drawstring-bag/2009/02/08/
Post a Comment